
How to Record Pop Vocals, Pt III — Mixing
For this final instalment, JMC alumnus Peter goes from raw takes to polished production, detailing every part of his vocal mixing technique along the way.
Column: Peter Holz
Here we are, at the final stage of the vocal process — mixing. Previously, we’ve gone over recording and editing the perfect vocal take, but before we move on, let’s add some doubles and harmonies to the pie.
A ‘standard’ approach would be to have your big lead vocal down the middle, accompanied by two unison doubles panned hard left and hard right. This can be expanded to four, eight, 16, or as many as you want.
If you record a large amount of unison doubles, you can splay out the panning and get an ‘anthemic’ sound. This will only work if the doubles — either naturally by the singer, or in the editing stage — are all very tightly locked with the lead vocal, otherwise it will sound messy. Peking Duk’s Stranger is no less than 16 vocals in unison at all times [see [fig-1] for a common chorus vocal arrangement].

Keeping on the unison train, try some that are sung much more softly and with more ‘breathiness’, though this doesn’t mean whispered. Adding upper and lower octaves to the vocal melody is also common. Either record them, or pitch some of your unison doubles up and down with a tool like Soundtoys Little Alter Boy and blend those in.
Harmonies are no different — stack them, layer them, pitch them, pan them. Moulding all of these ‘backing vocal’ layers takes a lot of time, both to record, and to edit and arrange. Still, unless your song sounds better without layers… do it!
I will often work by building up every conceivable layer and harmony for a section of a song and getting the mix and effects to work. From there, I can build my arrangement by addition and subtraction. Maybe the first chorus has only doubles, with some breathy layers in the second half. Then the second chorus has all of those plus a harmony, and a low octave in the second half. You get the idea.
LEAD VOCAL CHAIN
Okay, let’s assume you’ve perfectly edited your vocals, labelled, colour coded and setup your initial routing. Let’s get mixing.
I developed a fairly in-depth lead vocal mixing chain after spending time at the inaugural Mix With The Masters seminar with Michael Brauer. The basic premise is that the vocal is feeding a bunch of different compressors that are blended together. It’s not to achieve multi-band style compression, but to blend a vocal ‘tone’ or ‘attitude’ together. Oftentimes, some of the compressors are doing little or no gain reduction. Alternatively, in some pop vocal arrangements, there may not be a set ‘lead’ vocal. In those cases, I don’t really use the Brauer approach.
Here’s a basic overview of my approach to mixing a lead vocal that could be applied with any basic processors.
Step 1 — MANUAL DE-ESSING
There is no better way to control esses than to manually adjust them. I will commonly do this with automation on the clip (clip gain) to nail it right at the front of the chain. I will also add similar automation to breaths and consonants like f, t, p, b and c. Simply fine tuning how hard a vocal transient hits, makes room for applying much more consecutive EQ and compression. I will usually perform this fine tuning towards the end of a mix, after applying all other processing, as you don’t really know where these sounds need to be until you’re nearly at the finish line.
Step 2 — TAPE SATURATION
Over the years, I’ve found that a tape simulator is the best tool to soften some of the high frequency content and transients to balance them with the rest of the signal. [fig-2] Sometimes I’ll record though a tape simulation plug-in in the UAD Console as well as applying it at the top of the vocal chain. I use the UAD Studer A800, fine tuning the high frequency and transient response with the bias adjustment.

Step 3 — AUTOMATIC DE-ESSING
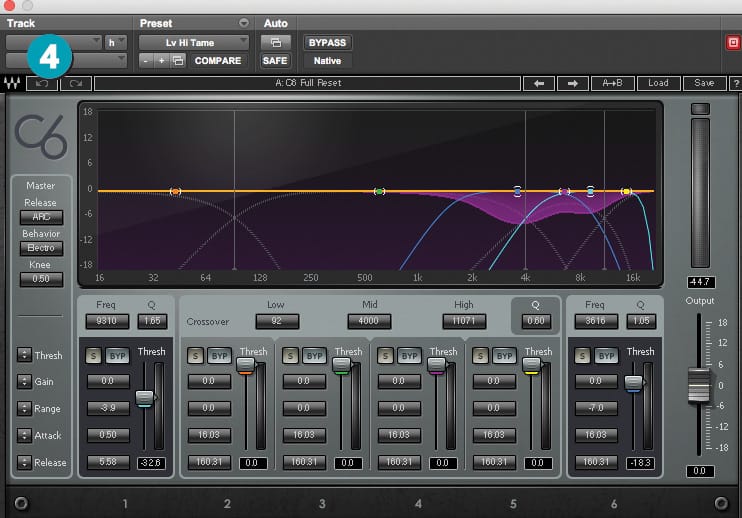
Even after doing my manual de-essing I will use regular de-esser plug-ins to further massage this signal. I use these with very low ranges (-3dB or so) so I’m not relying on them to fix esses, just to fine tune what I’ve already done manually. I always use two de-essers in a row, in wide-band mode. The first one set to around 5-6kHz focussing on the ‘Shhh’ sounds, and the other up around 10-11kHz focusing on the ‘Sss’ sounds. [fig-3] Waves R-De-esser is my guy. I’ve never really gotten down with super detailed de-esser plug-ins like Sonnox Supressor or Fab Filter Pro-DS. Occasionally I’ll get a multi-band plug-in involved at this stage if there’s some honk or squark or zing or boom, or other hard to describe sounds like that. [fig-4] Waves C6 is still my favourite for doing this, however, [fig-5] Oek Sound Soothe is amazing and the dynamic bands in bx_EQ3 are simple and always work.


Step 4 — EQ
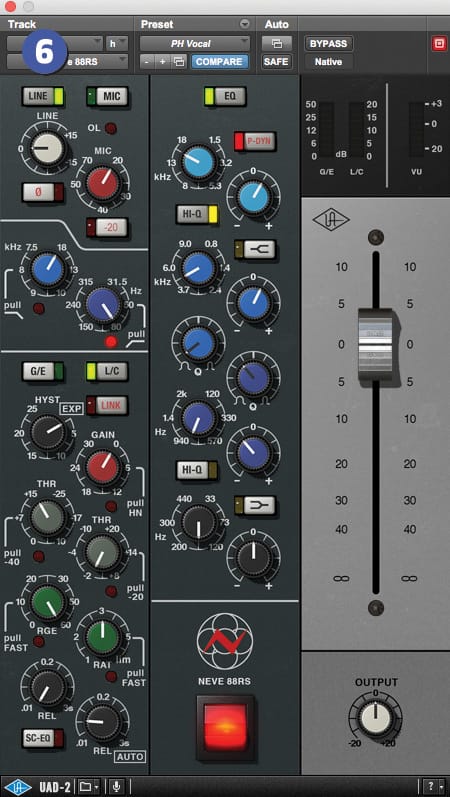
Now there’s no dodgy stuff going on with your lead vocal, it’s time to make it shine. [fig-6] Here I’m commonly using a channel strip type plug-in — usually UAD Neve 88RS — to apply a slight high-pass filter, open up the top end, and either boost or cut the low end or low mids, depending on what the song needs. I usually end up automating this EQ or having different channels for different sections of the song. Sometimes another ‘air lift’ plug-in like UAD Maag EQ4 or Black Box HG-2 will feature here, too. While I’m working with the channel strip I’ll sometimes kick in the compressor and just tap the signal lightly with a fast attack and release, and high ratio; very subtle limiting, always post EQ.
Step 5 — COMPRESSION
I will always put the compressor after the main EQ, otherwise you’ll bring out more sibilance. [fig-7] This is the stage where my signal would usually get sent off to five or six different compressors and blended back together. When I’m using a compressor on a vocal I’m never thinking of the gain reduction, the ratio, or the attack and release times. I’m not going to say ‘use these settings’ or ‘don’t use this ratio or speed on a vocal’. I am purely using the compressor as a way to position the vocal in front of the listener and control how much it moves backwards and forwards, and whether it is pushing out through the music, floating above it, riding the wave of the music, staying still, or moving against it.

To me the compressor is purely a movement generator or controller. I don’t care about gain reduction and dynamic range, I care about whether the vocal is moving nicely with the music.
Step 6 — SIZZLE
Before looking at effects, sometimes I’ll get something involved at the ‘end’ of the main part of the chain. Perhaps it needs some slight distortion like another BlackBox HG-2, Decapitator, Manny Marroquin Distortion, or McDSP Futz Box. I might want to add some super silk to it with an Aphex Aural exciter.
Step 7 —AUTOMATION
Level automation is key to get a vocal to sit ‘right’ and ‘pop’ out of the mix. Some moves are obvious and can easily be achieved by just turning a whole line or word up or down. Some are more subtle, but can make a huge difference.
A common example is bringing up the tail of words. This makes the vocal feel like it’s right there in front of you (an experienced singer will sometimes do this for you with their microphone technique). Occasionally you’ll need to drastically bring up a word or line to keep it audible above the music. When the start of a verse is an anacrusis at the end of a loud chorus, those first few lines might need to come up by five to 10dB. Proper gain staging is crucial. You should always be able to have the vocal exactly where you want it; you should never be fighting against the music or your processing in terms of basic balance and level.

Apply for JMC Academy’s Audio Engineering and Sound Production, or Masters of Creative Industries courses, to get qualified with hands-on experience, study abroad options and internship opportunities. Intakes in February, June and September. Check the courses out online at jmc.academy/audioat
MIXING IN EFFECTS
DELAY
[fig-8] My only mainstay is what I call a ‘cobweb’ delay. This is always a tape-style echo, or a send to my actual EP-3 Echoplex. Its purpose is to invisibly tie the vocal back to the music. It allows you to have the vocal in front of the music, but the two things still have a relationship. The listener should never really hear this delay. My starting point would be a dull tape echo or low passed echo of some kind, returning in mono directly in the centre behind the lead vocal. Not much feedback and no synchronisation to the tempo (my delay time usually ends up around 200-300ms).

Any other use of delay to me is completely subjective and depends on the song. Make them change throughout the song. Have a slow one in the verse and a fast one in the chorus. Use an over-the-top ping pong in the middle eight. Have an obvious slapback.
There is of course the standard ‘delay throw’ where the end of a phrase is echoed out. Try sending the return of your delay throw to a reverb, or widen it, or formant shift just the delay return, or automate a pitch down on it.
A ducking/dynamic delay should not be overlooked. It can be very effective and add more subtlety to your echoes. It can also be used to create a ‘sucking up’ feel if the delay time is short and the delays come back up quickly.
REVERB
Again, reverb is completely subjective. Maybe there is no reverb at all in the song. The in-your-face dry vocal sound is really great — use that in the verse then go big in the chorus, or the opposite. Try a subtle, wide short room reverb on your in-your-face dry vocal so it feels like the listener is in a room with the singer. Have a short, bright gated room on the lead vocal (although you can’t do that now after Niall Horan’s Slow Hands).
[fig-9] I used to have a Lexicon 480L but sold that long ago and now commonly use the UAD 224 or the Native Instruments RC-24 or RC-48, which are great, to get the classic Lexicon sound. Listen to the vocal reverb in Elton John’s Can You Feel The Love Tonight to hear the most wondrous big splashy Lexicon sound ever.

WIDENING
This can be very effective if done well. Some of the ways I’ll achieve this is with two short ‘slap’ style echoes about 6ms apart panned hard left and hard right. I usually use the Waves Manny Marroquin Delay to do this as you get extra built-in goodies.
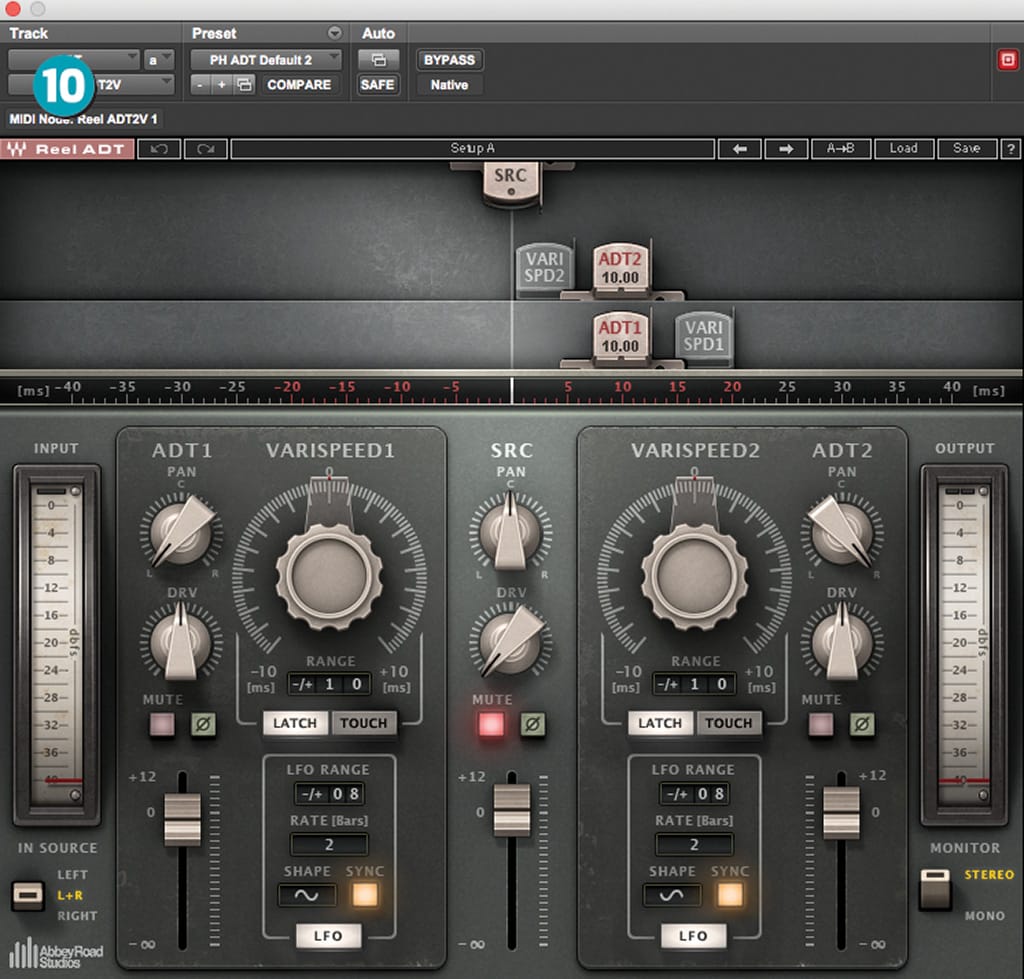
Eventide-style widening is also great with something like Soundtoys Microshift or UAD’s Eventide H910. [fig-10] Waves Reel ADT is amazing and I use it all the time to create a pseudo ‘tripled’ effect. A subtle chorus can be good here, too. There are so many options.
PITCH SHIFTING
Sometimes I’ll have a pitched down version of the lead vocal running underneath it. Pretty much exclusively done with Soundtoys Little Alter Boy.
DRAW THEM TOGETHER
To me it’s important that all of these effects are returned into a vocal bus and then compressed and equalised with the straight dry vocal. If I’m mixing the track, that includes some other instrumental elements, too. It really lets the vocals and their effects ‘get to know each other’ and form their own relationship in the song.
[fig-11] I commonly use a UAD Neve 33609 or a Waves API-2500 compressor to do this. Occasionally, I’ll use a final dynamic EQ/de-esser to meld all of the vocal attack and brightness together. Importantly, these processes have nothing to do with level or compression, they are there to get all of the vocals and their effects to move together.

HOW LONG DOES THIS ALL TAKE?
It’s not uncommon for me to spend 10-20 hours just on the editing and mixing for one song. Always remember that people will make their decisions based on what they hear. If it’s going to the artist, manager, or A+R, don’t send them something that could be better if you worked on it more, or put in a disclaimer that it’s a ‘rough mix’ — you want them to hear your work and be impressed enough to hire you again. Your career relies upon this. Never pass blame onto the equipment, the song, the singer, the weather, the time of day… no one cares about excuses.






RESPONSES