Review: Maschine Studio & Maschine 2 Software
Native Instruments wants your eyes firmly focused on its Maschine Studio flagship controller. With two onboard screens, a lot more controls, and deep integration with Maschine 2 software, there are fewer and fewer reasons to resist.
Review: Josh Needham
The whole reason I got into Native Instruments’ Maschine was because of performance. One in particular. I was at a music conference watching an artist build songs completely on-the-fly, pure improvisation but with any sound at his fingertips. The buffering, the sounds, the ability to adjust entire sections without ever slowing down or having to stare at a screen seemed liberating for someone who’d always played traditional instruments. I was hooked; it was a ‘next step’ moment for me.
I’ve had a Maschine MkII for a few years now, mostly using it to produce tracks and complement my Logic workflow. But recently I’ve been trying to work out how to integrate it into my band’s live show: a combination of Maschine, Ableton Live and a full band. It’s funny though, because while I’ve been focusing on the live side of Maschine, I’ve also had the pleasure of playing around with the new Maschine Studio controller — which, as the name says, is leaning in the opposite direction.
STUDIO SAVVY
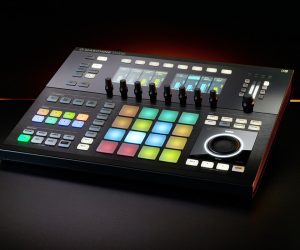
The Studio looks pretty impressive. It’s not as portable as my Maschine MkII, coming in at an extra 60% in total size, and an extra 50% heavier. You could definitely schlep it around, but not being able to shove it in a laptop bag makes it feel like it’s meant to stay put.
What do you get with that additional real estate? 19 extra buttons, a jog wheel, level meter and master control section, and two high-resolution full-colour displays. When you put it in a sentence like that, it doesn’t sound revolutionary, but controllers are all about workflow, and the Studio amps-up tactile interaction with Maschine more than you can tell by looking at pictures of knobs. On the back you also get three MIDI outputs and one MIDI input as well as two footswitch connections. Which makes me wish my MkII had more than just the 1-in/1-out MIDI interface. Those connections would be killer additions in a live setting — say, playing guitar and starting and stopping backing tracks with my foot — which is not what the Studio was designed for.
Back to the surface, and the first thing you notice — also the fundamental difference between the older units and Studio — are the upgraded screens. While not quite Retina-level resolution, it’s like staring at a pair of smartphone screens.
And this is where Native Instruments is hanging its hat; these two little screens are supposed to supplant your computer’s. If you run into anyone giving you a Maschine Studio demo, at some point in the spiel, they’ll close the lid on their laptop and keep playing along like it’s a no-look pass.
In use, it’s a lot more friendly then it might appear. NI has set up the dual screens to constantly work in tandem. This is most noticeable when working with the arrange panes. While the right-hand screen takes you deeper and deeper into your workflow, the left-hand screen tags along one step behind, always making sure you’ve got a look at the bigger picture. So on one side you might have your scene pattern, and the piano roll or pad layout on the right. You can also zoom horizontally and vertically on both screens with the twist of a knob, which alone is an improvement over mouse and key combinations.
You can go really deep into editing on the device. Now when you nudge and adjust notes using Maschine, you can see what you’re doing on the unit. Hit ‘Events’, then select the instrument you want to edit by hitting the pad for that instrument, and you’re in. Once you’ve selected the note with the page left and right buttons, you can adjust Position, Length, Pitch and Velocity with the knobs.
It’s all things you could do prior to Maschine Studio. But you had to look at your computer screen and switch to a mouse and keyboard to edit the take you just laid down. Now, there’s no interruption. You simply transition from pads to buttons and knobs, without ever taking your hands off the device. Though even with the built-in stand angling the screens toward you, you’ll need to resist the urge to constantly hunch over the unit.
NEED TO KNOW

THE VISUAL MIX
Another great bit of visual feedback is the mixer. With the Maschine 2 software, you can have an unlimited number of groups, and you can also stack different sounds into the same bank. But keeping track of unlimited options is difficult. While the Maschine MkII has a simple mixer with levels associated to pads, the Maschine Studio mixer features full colour-coded metering of eight channels at a time. But best of all, it includes the name of each sound associated with the pad, making it a great instant visual reference for live performance.
There are a few caveats which will have you looking up from the unit from time to time. Firstly, you scroll through your instruments and sounds using the right-hand screen. NI has split the screen in half, one half featuring the instrument logo or name, and the other half scrolls through all the different patches. While it looks great and is nice to know you’re in Abbey Road ’60s Drummer, not stuck in the ’50s, it also limits what you can see of the kit name. It truncates the name, so often you’ll be left with something like ‘Abbey Ro….y kit’, which isn’t that helpful. Secondly, if you have a long plug-in chain, the knobs are usually assigned to the macros, so you’ll have to set up your own macros or adjust deeper parameters onscreen. The second one isn’t a flow breaker, but it would be nice to see NI reconfigure the browsing visibility.
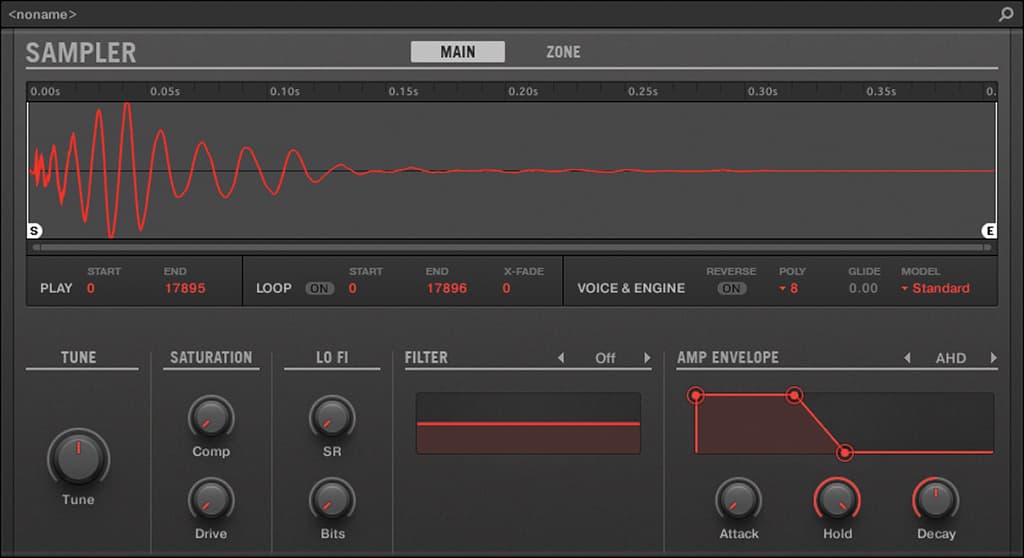
Sampling has also been reinvigorated in Maschine 2, the two screens on Studio really give you more confidence in your slices. And now your sample can be as long as you like, dependent on your RAM settings. It’s also much more accurate, with eight-point sample interpolation and four modes of detection. You can also slip the ends of sample regions without it affecting the next slice, and the parameters are all ganged below the waveform view in the software, so you don’t have to go hunting for them.
CUE THE METERS
Other than the onscreen, per-channel metering, Studio also has a central 16-segment LED bargraph meter, on which you can monitor and adjust the Master, Group, Send, Instrument or Cue. It’s a really handy touch and another big contributor to keeping you locked into the hardware. The Cue send is new to the Maschine 2 software, which is a huge deal. Now you can audition sounds on-the-fly, you just have to set up your audio interface’s headphone output as the Cue bus.
The jog wheel is also a nice addition. Maschine 2 alone comes with 8627 samples, which is a lot to sort through. Having a jog wheel cuts down on potential RSI, and makes scrolling quicker too.
Most of the new buttons on Maschine Studio give direct access to options available on the MkII (but would have probably required a shift key to access) — with the exception of the dedicated Arrange, Mix, Channel and Plug-in buttons that are suited specifically to the Studio’s screen options.
And this is the truly great, but odd, thing about Native Instruments and Maschine. There’s nothing you can’t do with a Maschine MkII controller and Maschine 2 software that you can with the Maschine Studio and software. The functions are identical. Any other company would hold something back from ‘lower-level’ users as an incentive to upgrade. NI just sees its alternative offerings as different strokes for different, or even potentially the same, folks.
But here’s the thing: the Maschine system is all about hardware and software interaction, and knowing how to whizz around the surface without stopping for a quarter note beat. But with the addition of these new buttons there is a bit of a learning curve when it comes to transitioning between the Maschine MkII and Studio control surfaces. I was playing around on it at a friend’s studio. He has Komplete, but has never laid his hands on a Maschine controller. Often times he was able to intuitively figure out a key command for a function I was stumped on precisely because he hadn’t used a Maschine MkII.
That said, it didn’t take too long to adjust, it just might trip you up if swapping between controllers irregularly for live and studio use.


MASCHINE 2 DEJA VU
The Maschine 2 software is the other half of the bargain. Apparently Native Instruments spent four years deep in redevelopment. A whole new sound engine was top of the list, and with that comes one of the more interesting developments — the drum synths.
Now that it’s arrived, it almost feels like déjà vu; as if Maschine was always destined to have a drum synth at its core. When you think about it, while you can play notes and chords with the 16 pads on Maschine, they’re still pads. They’re meant to be tapped, flammed and bashed into submission. So turning Maschine into a drum machine makes a lot of sense.
There are five synthesisers onboard: Kick, Snare, Hi-hat, Tom and Percussion, each with a number of ‘engines’ to use as a base point. For instance, the Kick synth has eight engines, giving you 808, 909, and other dance and acoustic-style starting points. There’s a whole raft of Snare starting points, from vintage, metal drum sounds, to hand claps, and the Percussion engine covers most everything else. With the release of 2.1 software NI added a new Kick engine called Grit, so expect to see more engines, as requests for different sounds filter in (2.1 also added some more expressive performance modes to the shaker, so this is definitely not a one-and-done effort from NI).
The new drum engine points to a couple of developments. Firstly, that NI seems to be leaning towards Maschine being its hub. Not only has it added drum synths, you now also get the Massive synth as part of the Maschine 2 software package, as well as the Scarbee Mark 1 electric piano, Reaktor Prism and the Solid Bus Comp. Hopefully we’ll see more packs migrate towards Maschine.
Secondly, while you can import V1.8 projects into Maschine 2, new packs won’t be backwards compatible, and we’ll start to see NI use its drum synth engines more liberally. After all, NI spent a lot of time developing the new audio engine to make use of multiple cores, so there’s a lot more scope for powerful developments and new engines with Maschine 2.


A MASCHINE FUTURE
There are a huge amount of developments that NI has debuted with Maschine 2 software, and hard to list them all here. Some of the highlights are: built-in sidechaining; the ability to set a loop range independently of scene start and end points (great if you’re doing a roll); tag-based browsing; new cut-down GUIs of plug-ins and instruments like Massive that are expandable when required; a gate function that lets you adjust the length of note repeats; pinnable effects so you can set up master chains; and a new plate reverb and feedback compressor (the kind of design you’ll find in most vintage compressors).
For $99, it’s a no-brainer upgrade: You get tons of new functionality; a better-sounding, more competent engine; new sounds and instruments; and a whole drum synth thrown in.
Just be prepared to go through the pain of transitioning your 1.8 groups and projects across. There are a few ways to do this, and I can’t say I had the easiest time. I had to resort to manually filtering them in. But there seems to be varying levels of success with using the ‘Import Maschine 1.x Format’ command, which is the cleanest path if you can get it to work. The key here is to make sure you update everything before trying to import, and be prepared for a slow transition. Don’t expect to jump straight into Maschine 2 overnight and resume your projects. If it does happen for you, that’s great. Once everything’s running, you’ll be happy as Larry and ready to go. After a bit of teething, my Maschine 1.8 projects now load perfectly fine.
Once I unlearned a few key commands from the MkII, my general impression has been that Maschine 2 is overall much simpler to use. Which is the hallmark of a good upgrade — that it doesn’t descend into bloatware. Indeed, because of the drum synths and what NI seems to be planning for the future, if you want to keep playing along with Maschine you’re going to have to upgrade at some point. You may as well get it over and done with. And by the end of the process, you’ll at least be intimately acquainted with every Maschine folder on your computer.
BRINGING MASCHINE TO LIVE
Back to the task at hand: getting Maschine tempo and MIDI-synced with Ableton Live for live performance. I’d updated everything and used NI’s Controller Editor to set up my Maschine MkII as a Live controller. But attempting to use Maschine and Live side-by-side wasn’t really working out. I couldn’t get the Maschine software to sync to Live’s grid.
After a bit of a dalliance with using Maschine’s sampling features to trigger tracks, I had an epiphany — I needed to use Maschine as a VST plug-in within Ableton. A simple answer really. With the Controller template for Live installed I can now use the Shift-Control command on the Maschine MkII to flip between controlling Maschine 2 software and a large number of commands on Live: adjusting tempo, which tracks to play, mixing, and even effects. So far, so good. I’ve been able to set up, trigger and mix custom scenes in Live, sync up backing tracks with my drummer’s in-ears, and implement fully-functional, tempo-synced Machine drum programming and effects on the fly. It’s a really exciting addition to our live performance, and takes me back to when I first saw Maschine in action.


RESPONSES