Review: Ableton Live 12
What was on your Live wish list? In version 12, Ableton probably brought you something a little unexpected, but fun.
Christmas has come and gone, and the success of your Christmas gathering probably hinged on a few crucial factors: how well you get on with your family, the glazing of a ham, and the alignment of your Christmas presents with your wish list.
Ableton Live users will soon get to peel the wrapping off a brand-new version of Live 12. The stakes are always high with Ableton updates, because unlike the forced yearly upgrade cycle of many tech companies, major updates of Live are refreshingly infrequent. After the five-year gap between Live 9 and 10, Ableton seems to have settled into a tri-annual release cycle and the infrequency builds a level of expectation that the new version will meet at least three years’ worth of demands. It’s like every child wanting Minecraft for Christmas, but Santa has to pre-build one world to perfectly suit each kid.
If you want to look for an Ableton user wish list, the logical place to go is Ableton’s Centrecode forum where Live beta testers get to submit and upvote feature requests. Here’s the rub: if Ableton’s sole focus was to knock off the beta tester wish list each upgrade cycle, we could expect a lot of socks and underwear and we’d all be terribly bored. After all, the number one most requested feature is ‘Bounce in Place’. I get it, we want utility, but it’s not exactly asking for an electric scooter, is it?
The whole reason I moved to Ableton Live after years in DAWs like Cakewalk, then Pro Tools and Logic Pro was that it felt more like a playground than a cubicle. I could pick up toys, mash them together and see what came out. Everything about the way it pushed me to think was clearly skewed towards embracing the computer as a part of the music-making process, rather than an emulation of an analogue recording system where the music largely happened outside of the box. It was able to inspire and express things I couldn’t before, and I suspect that’s why a lot of people use Ableton.
It’s not to say Ableton hasn’t done its due diligence. Bounce in Place has been implemented with a new menu command that combines Freeze and Flatten. It’s way faster and a welcome inclusion. While the second most requested feature ‘Freeze Groups’ hasn’t materialised, you can select multiple tracks and essentially render them in place – not quite, but a similar outcome.
ARA OF IMPROVEMENT
The third-most requested feature is the inclusion of ARA 2 for keeping tools like Melodyne or Vocalign in sync, which hasn’t made it into either Live 11 or 12. It’s a head scratcher, and a hit to my own wish list, but it’s a little like a DAW user personality test. The type of music you’re making would probably be defined by whether you would prioritise the accuracy of Melodyne’s vocal pitch correction over granular synthesis or random generative MIDI. The first is squarely left brain, while the latter suit a more exploratory, right brain process. In the meantime, I continue employing workarounds to lasso Melodyne into my production flow. If I had to choose between pitch correction and ‘fun’, I still think I’d rather have Ableton throw me down creative rabbit holes.
On Centrecode, there were a lot of calls to enhance the browser organisation, and this has been significantly addressed with a completely new tag and filter system for the browser, which allows you to browse extensive collections of sounds in a more meaningful way than typing in basic words like Bass, Snare and Kick then still having hundreds of sounds to trawl through.
Ableton has already put in a lot of work to assign filter categories to existing packs, but you can also edit and apply your own filters and categories if you want to adjust the classifications. It’s a big help but may take some getting used to for those who’ve already spent time organising their own user libraries in a particular structure.
The game changer here is finding similar sounds. Click on the ‘approximately equal to’ sign (technically ‘asymptotically equal to’ for the maths whizzes) and it’ll bring up a list of sound-a-like patches. It worked well a lot of the time and is a big speed boost when you’re looking for a slightly different take or timbre for a patch or sample that almost works.
NEED TO KNOW
Ableton Live 12
Digital Audio Workstation
NEW GENERATION OF MIDI
Thankfully, Ableton’s boffins are an inspired bunch and don’t settle for satisfying our more pedestrian requests. Most of the new features in version 12 haven’t featured on the wish list but will definitely inspire your creativity. There are now built-in tuning systems so you can go full microtonal and change your temperament with um, your temperament; a new bi-timbral synth, Meld, that pulls in oscillators from obscure places to wrangle textural masterpieces; new saturation audio effect, Roar, that can be subtle or send you into wildly, modulated feedback territory; and the third iteration of Granulator from one of Ableton’s founding creators, Robert Henke, is vastly improved, less Max-y, and more Ableton native-looking, integrating the infinite possibilities of granular synthesis more completely into the Live ecosystem.
Perhaps the most significant inclusions are the new MIDI Transformation and Generative Tools, which natively sit in the Piano roll tabs alongside a renamed Notes tab (now called Pitch & Time Utilities, which adds the ability to stretch or compress notes and insert intervals at predefined scale degrees). By natively including them, Ableton no longer views these tools as fringe MIDI modulators, but core to the music-making process. Instead of putting an arpeggiator in your instrument chain, for instance, you can use the MIDI transformation tool to create arpeggiations with the actual MIDI notes, and tweak them to your heart’s content.
To make room for these new tabs, Envelopes and MPE have been moved into a new location above the piano roll, making for a much more intuitive experience.
The MIDI transformation tools integrate arpeggiation and quantisation into the piano roll along with six other tools like Recombine which can take the Pitch, Length and Velocity of notes and apply them to others, completely reinventing a passage of MIDI notes in one click. There’s also the grace notes and flams of Ornament. ‘Connect’ fills empty gaps with notes per your specification of rate, spread and density. You can adjust the length of note end times with Span’s Legato, Tenuto or Staccato timing, offset notes in a chord with Strum, or use Time Warp’s convex/concave stretching of note passages. You can apply these transformations on the fly by toggling the Transform button on, or manipulate your settings blind and use the Apply button to see what you’ve come up with. The key here is seeing these MIDI tools transform and edit your actual MIDI notes with a few knobs, sliders and settings.
If I had to choose between pitch correction and ‘fun’, I still think I’d rather have Ableton throw me down creative rabbit holes

Live 12’s built-in MIDI transformation tools can add to, mangle or augment your piano roll. (Above) Connect fills that empty gap with a high rate of notes over a particular spread and density. (Below) Recombine reinvents the arrangement of a simple arpeggiation by twiddling the rotation of Pitch, Length and Velocity.

On the MIDI Generation side you can start from scratch and carve out a MIDI clip’s worth of notes with a few clicks. Stacks is particularly cool. It will create a sequence of one to four chords, using your Scale mode to set chords by their root note and chord type – from a simple I III V triad, to a Cdim11sus2 – and you can set the inversion, length of the chord and its offset. Rhythm is a handy little tool for single-note pattern generation that you can use to randomise interesting kick or clap patterns by adjusting the steps, pattern, density and accents, as well as the chance of random note splitting. Seed takes a more polyphonic route by generating notes based on a selection of range sliders for pitch, duration and velocity. You can add up to seven voices and dial the density up to 100% to fill every nook and cranny on your piano roll. The final generative tool is Shape, which creates notes in selectable pre-defined shapes like angled lines, triangle shapes and arcs. You can also draw in the window to create a custom shape, then play with the pitch range, rate, tiling, density and jitter to fill out your composition.

SCALED-UP TUNING OPTIONS
In Live 11, Ableton introduced Scale Modes which integrated the Scale MIDI Effect in a more intuitive way so you could fold your piano roll to a mode like Bb Dorian. In Live 12, the Scale mode is now represented in the transport bar as well as in each MIDI track’s Clip tab. While you can still have separate scale modes for each MIDI track, you can also highlight multiple tracks and globally change their scale mode or set them to chromatic, using the transport bar control, which is very helpful. MIDI effects can also follow the scale mode, and you can set new synth Meld’s oscillators to follow the scale degrees. A neat addition to the piano roll is the ability to Highlight Scale, which changes the labelled root note and highlights the relevant note lanes in a lilac colour.

With ‘Highlight Scale’ switched on, all the notes in my D Mixolydian scale are highlighted a lovely shade of lilac.
Going one step further, Live 12 now incorporates Tuning Systems. Unlike Scale modes, you can only choose one tuning system for your project. If you’re unfamiliar with tuning systems, Western music is largely based on 12-tone equal temperament tuning which gives us the 12 piano keys in an octave. The equal bit is that the frequency of each note is divided equally on a logarithmic scale and usually tuned to a central pitch of A at 440Hz. Surprise, surprise, not all cultures and music genres tune their instruments that way.
Tuning systems have been around for a long time, and so has the Scala technology Ableton employs here (see box item). It’s a matter of simply dragging and dropping a tuning file into the Tuning GUI and all your piano rolls will adjust to anything from a mid-20th century version of Egyptian Maqam Suznak to a 43-tone undecimal rational intonation scale by Harry Partch. The tuning systems are global but you can individually bypass MIDI tracks, returning them to plain-ol’ equal temperament. You can also map how the tuning relates to your MIDI controller in quite detailed ways, from just the black or white keys, to setting up custom layouts – especially helpful when the tuning systems include more or less notes per octave than 12.
You can import any Scala file (.scl) into the interface. Ableton’s pre-included tunings come in an .ascl file type, but so far it looks like .ascl files simply provide a weblink to Ableton’s own Scala creation interface and further information about each scale. The website is currently in beta and only a handful of scales are fleshed out, but it’s a helpful resource when diving into an area that starts out complex and flies into rocket surgery territory fast.

Ableton’s new tuning system explainer site also has an online Scala editor, so you can create your own custom tunings from scratch, or modify others.
You can bypass the tuning for individual MIDI tracks, which defaults them back to, yawn, equal temperament. You can also map how the tuning relates to your MIDI controller in quite detailed ways, from just the black or white keys, to setting up custom layouts – especially helpful when the tuning systems include more or less notes per octave than 12.
SUITE FEATURE DRIP FEED
If you’re not a Suite user and looking on with envy, don’t worry, you’ll once again benefit from the continual drip feed of features that pass down as Live advances a generation. As well as all the core Live 12 additions, Standard users upgrading to 12 this time around will now have access to four extra instruments: Analog, Collision, Electric and Tension.
Live Lite, often bundled free with controllers, has recently had take-comping rolled into it (which was only added in one of the later Live 12 beta releases). Lite also cops two packs, Beat Tools and Build & Drop. These are also included in Intro and Standard, which also get the Drive & Glow pack thrown in. Standard gets even more beefed up with Electric Keyboards, Orchestral Strings, Session Drums Club and Studio and Synth Essentials packs, making it a much more rounded version than ever before.
If you want to find out more about Scala, you can head to the Huygens Fokker foundation website: www.huygens-fokker.org/scala
There you can find out much more about Scala and download the entire 5100-strong scale archive of .scl files if you want to dive headlong into a universe of microtonal exploration.
MELD: THE UNEXPECTED
Meld is a bi-timbral macro oscillator synthesizer for Live 12 Suite owners. It will introduce you to a whole scope of wild oscillators like Extratone, which is based on a genre operating at ultrafast bpms of 1000+ where kick patterns become tonal. Or Bit Grunge, which takes you down a few bits. There are swarm varieties of your classic waveforms, Square fifths, a Shepard’s Pi oscillator which gives you the Shepard Tone auditory illusion of a consistently ascending or descending tone, which Hans Zimmer used to great effect in the soundtrack for ‘Dunkirk’. There’s a bunch I couldn’t pin down (Tarp oscillator, anyone?) and other delights like Rain, Crackle and Bubble which sound like their descriptions. While it all sounds wild and fanciful, most of what Meld comes out with is instantly gratifying and its strength will be in its textural fabrications and otherworldly soundscapes, especially with filters like Plate Resonator and Vowel applied. While it’s a single synth addition, there’s a seriously wide palette to explore here.

New bi-timbral synth in Live 12, Meld, has a collection of new random oscillators. Here Filtered Noise and Rain combine for some gentle ambience, then fabricated into a wide textures with the dual filter section.
ROAR: SATURATION POWERHOUSE
Another Suite-only addition is Roar, a dynamic saturation audio effect. The key here is ‘dynamic’. While you can implement some quite subtle warming up with a touch of Tube Preamp drive with varying amounts and bias applied in a Single or Mid-Side routing configuration, you can also go completely mental by employing a Feedback loop or Multi-band configuration with three different drive shapers and filters modulated by two LFOs, Envelopes and Noise. While Meld can dish out a lot of beautiful textures, Roar can go from subtle to completely mental in a heartbeat. My favourite element was adding synced feedback and adjusting the feedback filter frequency and width for a chattery, alien texture. You can also add some bus compression, adjust the blend between routing configurations and mix your Dry/Wet signal. It’s a real saturation powerhouse.

Roar is Live 12’s new comprehensive saturation plug-in, running in full Alien chatter mode with synced feedback.
WISH LIST FOR NEXT TIME
While I didn’t get everything on my wish list, ARA 2 integration is probably the main thing I hope drops into the stocking at some point. Other than that, I’m really excited by the new MIDI tools; love the new layout features and filters for browsing; will definitely get a lot out of Meld and Roar; and may dabble in the occasional microtonal exploration. In short, it’s worth the upgrade to continue being inspired.
What is strange, is with AI being so buzz-y, there isn’t a lot of it on display here. By contrast, Logic Pro has been slowly releasing AI tools for years, and its new simple mastering plug-ins are exactly the kind of device Ableton users would love.
While the MIDI Transformation and Generation tools are amazing, Ableton has created the musical playground and left you to play it in it, rather than an AI tool suggesting a ‘flying fox’ that suits your mood from thousands of flying foxes it’s perused online. I think that’s just Ableton, while they continue to build more randomisation and generation features into Live, the boffins behind the scenes still want you to be involved in the music creation process, rather than it becoming a music curation process.

Live 12’s single screen views have been enhanced further with more device stacking, the ability to pull up the mixer in arrangement view, and new colour themes like this sci-fi-styled Riparian colourway.
EVERYTHING, EVERYWHERE, ALL AT ONCE
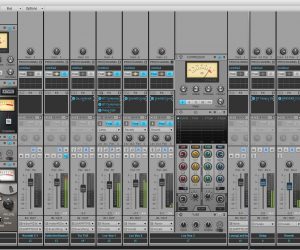
A lot of music-making happens on the fly and Ableton has always had a laptop-friendly approach with a strong single-screen workflow. Adding to that in Live 12 is the ability to toggle the mixer in and out of the Arrangement view – previously tied to Session view – a simple, but significant change. You can also stack the Clip and Device views, which along with the expanded Device views now gives you the ability to pull every control for a track onto one screen.
If it all starts to crowd your arrangement, you can use the little H and W toggles that attempt to fit the Height and Width of your production within the arrangement window. You can also adjust the Waveform zoom on and off and set how much zoom is applied.
Overall, the mixer feels much more refined, with colour gradations on level meters from yellow to orange as you get closer to peak, unlike the ‘all green until you blow out’ of Live 11. There’s a bunch of new colour themes as well, including a slightly green-tinged Riparian theme (pictured) and the golden hue of Twenty-Four Carat.


RESPONSES