Apple Notes 120
Logic Pro Brightens Up in 10.3
Logic Pro X has come a very long way since the initial release on the Atari ST platform back in 1993. Then a product of Emagic, ‘Logic’ never gained the traction of Steinberg’s Cubase on the Atari. However, the Atari was nearing extinction, and the platform was abandoned that same year. By ’94, Logic had started its evolution from a MIDI sequencer, to a hybrid application incorporating both MIDI sequencing and audio recording/editing — what we now refer to as a digital audio workstation, or DAW. Logic went from strength to strength on both Mac and Windows platforms. In 2002 Logic Pro was acquired by Apple, with Windows compatibility dropped from version six onward. This caused quite a stir at the time, with PC/Windows-based Logic users migrating to DAWs like Cubase or Sonar, or biting the bullet and investing in a suitable Apple Mac computer.
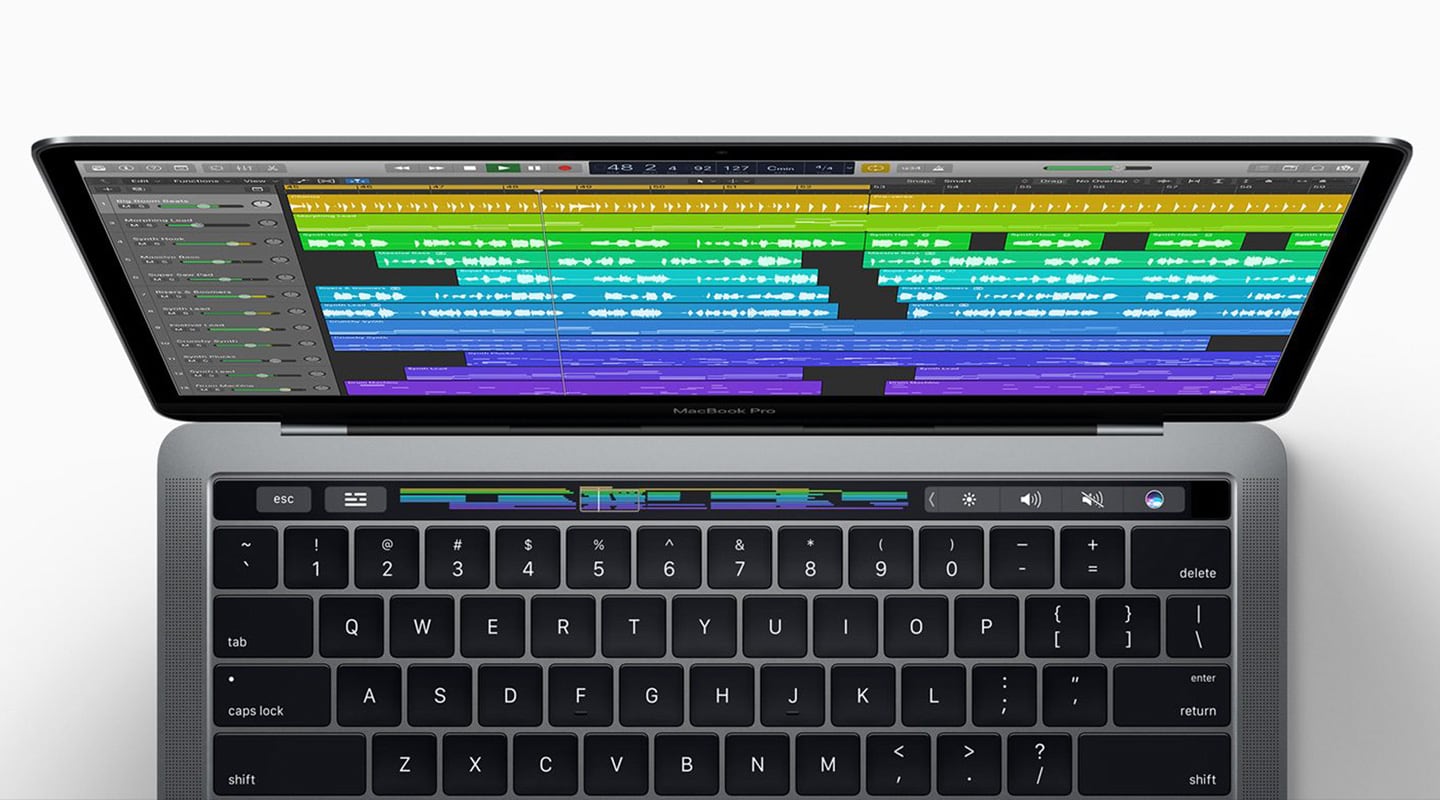
In 2004, Apple released Logic Pro 7, with the application completely rebuilt to look and fit into Apple’s ‘professional’ applications such as Final Cut Pro. This was the genesis of the Logic Pro X in use today, with its somewhat dark, grey-on-grey design scheme. I’ve never been a fan of the foreboding grey colour scheme — which has seemed to grow darker with each iteration since version 7. With the latest version 10.3, Apple has thankfully made a departure from the dreary Pro Apps look, brightening up the application’s interface and doing away with the skeuomorphic buttons and controls. It looks better overall. It feels clearer and more defined, and seems to flick between windows and screen-sets faster.
So what else does Logic Pro X 10.3 bring to the party. There’s literally hundreds of changes, additions and improvements, so I’ll pick out some that I feel are more important. More on the graphical front, window backgrounds can be set as light, dark, or a slider allows adjustment of the background from light to dark grey. Grid lines for the Main Window can also be adjusted from light to dark. Bright background is available in the Piano Roll Editor, but unfortunately doesn’t carry over to the Audio File Editor.
Another great graphical addition is ‘ghost’ waveform display. This allows you to see the entire waveform outside of a region being edited in the Main — really useful if you do a lot of waveform editing in the Main Window. Far less useful is the animated metronome on the ‘Click’ button in the transport. It moves back and forth… cute. Many of the control bar buttons now hide additional options which are accessed by a right-click or control-click on the button.
Of course there’s also support for the Touch Bar on the recently released MacBook Pro laptops, which I can’t really comment on not owning a new MacBook Pro. I’ve seen footage of the Touch Bar being used in Logic Pro X — it looks nice.
Mixing and processing additions are bountiful, with an important change to the summing bus. Logic Pro now offers a 64-bit summing bus, which will result in more ‘precise’ mixes. This can be toggled between 64-bit and the older 32-bit summing engine if you can’t hear a difference, or your machine stumbles in 64-bit summing. That said, I noticed no change in CPU usage between each summing method.
An extremely useful added feature is ‘Selection-based processing’. This allows selecting one or more regions, a Marquee selection, or a selection of audio in the Track section of the file editor. The floating Selection-based processing window offers two channel strips where you can add both native Logic plug-ins or AU plug-ins. This is great for running quick processes over files such as a quick de-ess on a sibilant vocal for example, without resorting to automation. Only thing is it seems Selection-based processing needs a little more work as I found the preview function didn’t always work — which is odd on an i7 processor with 25GB of RAM at its disposal — fingers crossed this works more reliably in 10.3.1.
Back to more traditional mixing features. Logic added the capability of running up to 256 busses, which isn’t something I’d ever use, but it’s there if you think you’ll need it. The I/O plug-in now offers a wet/dry mix slider which is excellent, and you can now automate switching sends on and off. Equally as cool is how hovering over a plug-in slot on a channel shows the plug-in’s latency in both samples and milliseconds within the help-tag — something Pro Tools users have had for many years. Oh and speaking of plug-ins, a list of your last five used plug-ins appears at the top of the plug-in menu. Also a god-send is the ability to paste only plug-ins or sends between mixer channels.
Finally there’s now individual panning placement of left and right signals on a stereo channel strip. A right click or control-click on the panning knob offers the standard Balance, Stereo Pan, or Binaural Pan. This allows you to set two pan locations and then move that spread left or right within the stereo field — way quicker and more intuitive than adding a Direction Mixer plug-in on every channel.
The new ‘Track Alternatives’ feature is great in the arrangement phases of composing, and allows tracks to have an alternate region order. It’s much like playlists in many other DAWs. Previously you could do this with folders on a track, but this way you don’t need to mute/un-mute the regions within the folder to audition each variation.
So that’s a handful of my favoured new features in Logic Pro X 10.3, although as mentioned, there are hundreds. Dive in – see what suits you, as there’s a million ways to get what you want from Logic Pro.








RESPONSES