Ribbon Microphones
In this instalment of his on-going series about microphones, Greg Simmons delves deep into ribbon mics to find out what makes them sound like they do, when to use them and when to avoid them.
In the previous instalment we saw that in the typical ‘capture’ path – from microphone to preamp to converter – the microphone was responsible for about 85% of the tonality of the captured sound. From this it was obvious that we should always pay attention to our choice and placement of microphones, rather than regarding them as magic sticks that we point at the sound source and rely on knobs, buttons and luck.
In this instalment we’ll be looking at ribbon microphones: how they work, the factors that influence their characteristic tonality, and how their design has benefitted from advances in technology. In following instalments we’ll do the same for dynamic microphones and condenser microphones.
RIBBON MICROPHONES
The ribbon microphone goes by a number of different names, including velocity microphone, ribbon dynamic microphone and pressure gradient microphone. In the interests of simplicity and clarity, we’ll refer to it as ribbon microphone or ribbon mic.
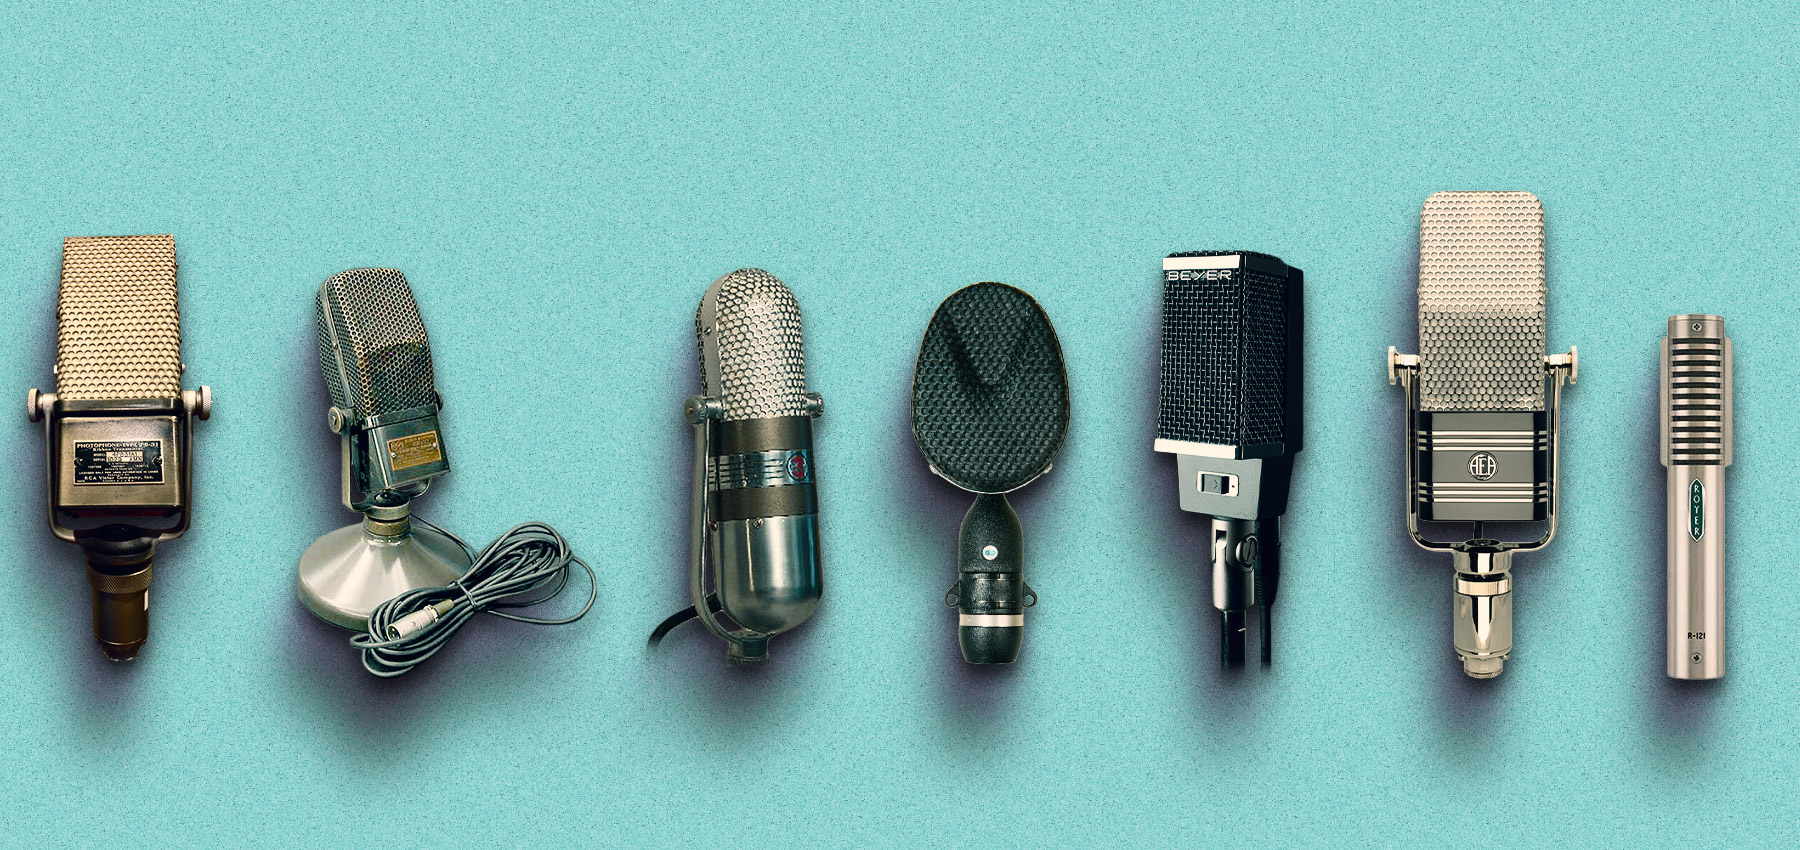
Although invented in the early 1920s by Walter H. Schottky and Erwin Gerlach at Telefunken, the first commercial ribbon mics were designed by Harry F. Olson for RCA and hit the market in the early 1930s – the first was the PB-31, followed closely by the classic 44-A and 77-A. They sounded considerably better than the condenser mics of the time, and other companies soon started making them. The ribbon microphone remained popular well into the early ‘60s, when advances in condenser and dynamic microphone technology overtook them; coincidentally at a time when recording and playback systems were getting significantly better, multitrack recording was becoming the norm, and engineers and listeners were seeking a brighter and quieter sound. The ribbon microphone soon fell out of fashion, and was consigned to being a delicate relic.
Although a handful of manufacturers kept the ribbon flame alive (notably Coles, BeyerDynamic and AEA), it’s fair to say that Royer Labs re-kindled interest in ribbon microphones in the late ‘90s with their innovative R121, which was considerably smaller, more rugged, brighter and quieter than most of the vintage designs. Ribbon microphones have since found a place in every engineer’s collection, complementing condenser and dynamic mics while filling many of the gaps between them.
RIBBON TRANSDUCTION
Ribbon microphones use the principle of magnetic induction, which states that passing a conductor through a magnetic field will cause an electrical current to be induced into the conductor. [A conductor is any material that an electrical current can flow through unimpeded.]
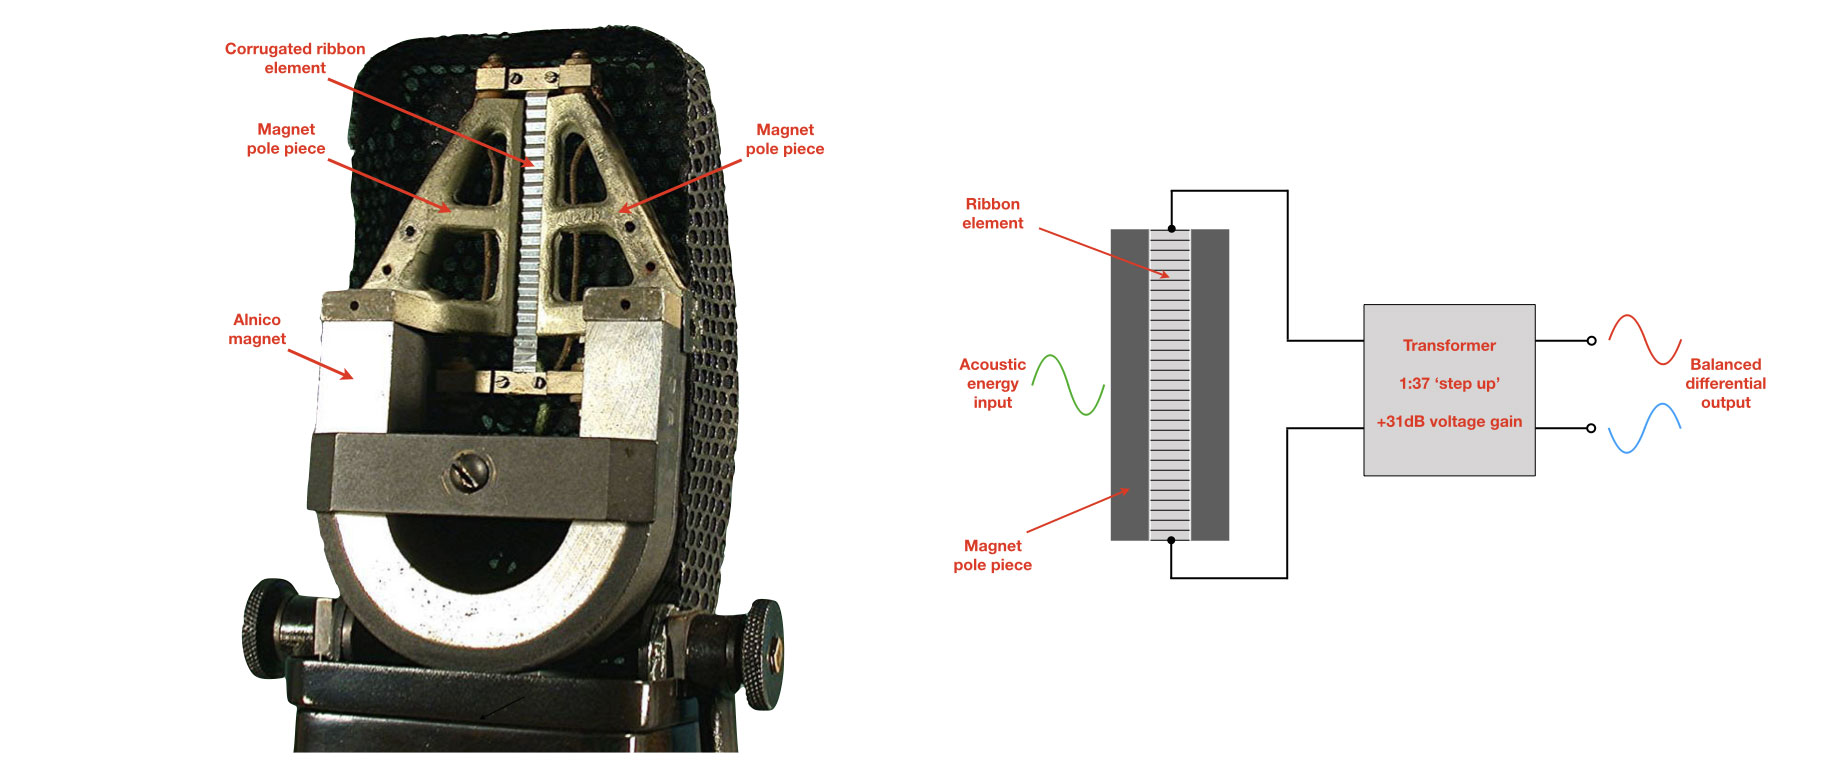
In a ribbon microphone the conductor is a thin corrugated strip, or ‘ribbon’, of aluminium (or similar non-magnetic conducting material, such as titanium) that is suspended within a powerful magnetic field. The vibrating air particles caused by sound energy make the ribbon move back and forth within the magnetic field, inducing a current into it.
The induced current is proportional to the sound energy that created it and could be considered as the electrical signal, except that it’s not suitable for connecting directly to a microphone preamplifier – it is too small and the ribbon element’s impedance is too low to provide a useable output signal voltage. To solve these problems the induced current from the ribbon is passed through a transformer that transforms it into a useable signal voltage. Happily, the transformer also provides a balanced differential output suitable for running the signal through a microphone cable and into a preamp.
[Impedance, transformers, balanced differential outputs and more are discussed in a later instalment of this series. For now, consider impedance as being anything that opposes the flow of a signal (the higher the impedance in Ohms, the more it opposes the signal flow), a transformer as a device capable of changing signal levels and impedances, and balanced differential outputs as being very useful when transferring microphone signals down microphone cables.]
PASSIVE RIBBON MICROPHONE
The description given above is for a passive ribbon microphone, where ‘passive’ means it does not require any source of electrical power to operate; for example, it does not require phantom power. All vintage ribbon mics and many contemporary ribbon mics are passive, and have three important characteristics to be aware of:
- They can be damaged by phantom power, particularly if the microphone cable is faulty or the mic output is being patched between tie lines, preamps or console inputs with TRS-style plugs and sockets (as used in professional patchbays). Vintage models with centre-tapped transformers are the most prone to this type of damage.
- They have a low output signal and therefore require a quiet microphone preamp with lots of ‘clean’ (i.e. quiet) gain.
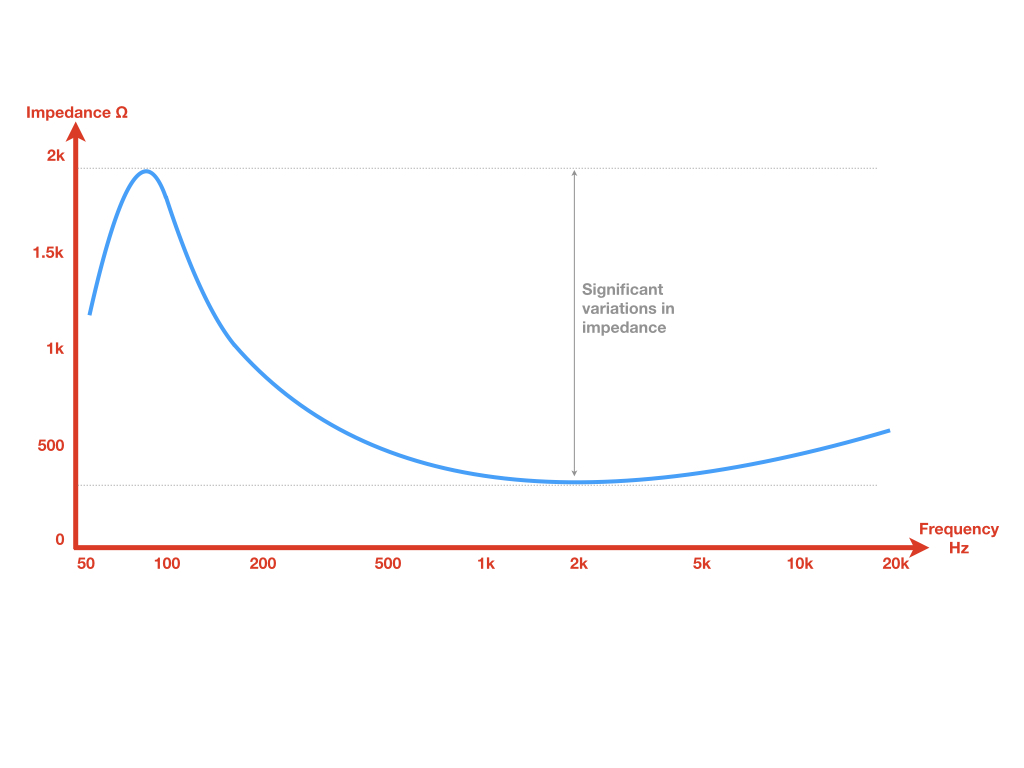
- Due to their relatively high and varying output impedance, their tonality is easily influenced by the input impedance of the preamps they are connected to.
Solutions to these problems, including in-line boosters and active ribbon microphones, are discussed below.
FACTORS AFFECTING TONALITY
Although the ribbon microphone uses the same principle of magnetic induction as the dynamic microphone (discussed in the next instalment), its considerably lighter ribbon assembly results in higher sensitivity to high frequencies and faster response to transients – although this is not always reflected in the published specifications.
HIGH FREQUENCY ROLL-OFF
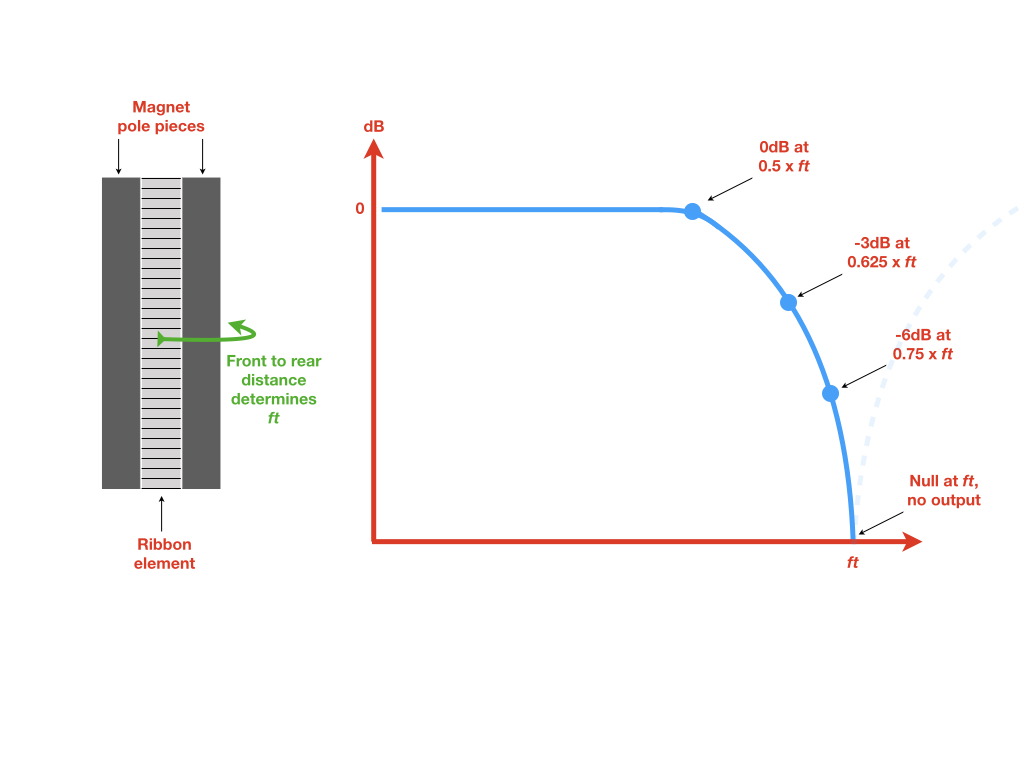
The most prominent contributor to the tonality of a ribbon microphone is its inherent high frequency roll-off, which starts gently before falling rapidly to the first of a series of nulls (i.e. dips caused by cancellation) – all determined by the shortest distance that sound can travel from the front to the back of the ribbon element via the magnet assembly on the side. The first null occurs at the frequency with a wavelength equal to that distance. At this frequency the sound energy creates equal but opposite pressure on either side of the ribbon, so the pressure on one side of the ribbon cancels out the pressure on the other side. The net result is no movement of the ribbon and therefore no output signal, creating the first null in the frequency response. We’ll call this null the termination frequency and abbreviate it to ft. The high frequency roll-off begins at 0.5 x ft and will be -3dB at 0.625 x ft, -6dB at 0.75 x ft, and a complete null at ft. Further nulls occur at all whole number multiples of ft.
You can calculate ft with the following formula:
ft = 344 / d
Where 344 is the velocity of sound propagation in air (in metres per second, at a room temperature of 21°C), and d is the shortest distance from the front to the back of the ribbon (in metres).
As an example, consider a ribbon microphone where the distance from the front to the back of the ribbon (around the side of the magnet) is 30mm. We must first convert d to metres, making it 0.03m. Putting 0.03m into the formula shows us that ft will be 11.47kHz (i.e. 344 / 0.03). The roll-off begins at 5.73kHz (i.e. 0.5 x 11.47kHz), drops to -3dB at 7.17kHz (i.e. 0.625 x 11.47kHz) and -6dB at 8.6kHz (i.e. 0.75 x 11.47kHz) before falling to a complete null at 11.47kHz.
Halving d to 15mm (0.015m) raises ft to 22.93kHz. The roll-off now begins at 11.47kHz, drops to -3dB at 14.3kHz, -6dB at 17.2kHz, and reaches a complete null at 22.93kHz.
Obviously, reducing the distance from the front to the back of the ribbon improves the microphone’s high frequency response. Some manufacturers use a magnet assembly that gets narrower at the centre, like an hourglass, making this distance as short as possible to raise ft and the -3dB point.
Published frequency responses are usually defined within a specified deviation either side of 0dB, e.g. ±3dB or ±6dB. The ribbon microphone’s published frequency response will never extend as high as ft because the signal level at ft falls below the maximum allowed deviation (it represents complete cancellation, so there is no signal). The frequency spectrum captured by the ribbon element extends considerably beyond ft, but with a series of nulls at whole number multiples of ft. Due to this, a ribbon microphone can reproduce frequencies higher than ft, but the frequency response will not be linear and therefore the reproduction won’t be accurate.

TRANSIENT RESPONSE
A microphone’s transient response describes its ability to accurately capture transients, like the attack of a snare drum or the pluck of an acoustic guitar. Transients contain energy that extends up to very high frequencies, therefore a microphone requires good high frequency performance and extended bandwidth to capture a transient accurately. This can cause confusion when discussing ribbon microphones because their published frequency response curves rarely extend beyond the first null, therefore showing a reduced bandwidth and early high frequency roll-off that is counter-productive to the requirements for a good transient response.
However, a ribbon microphone’s transient response and bandwidth are determined by two unrelated mechanisms: the transient response is determined by the weight of the ribbon, while the upper limit of the published frequency response is determined by the distance from the front to the back of the ribbon element. The ribbon mic’s ability to track and reproduce transients makes it sound brighter and clearer than its quoted frequency response would suggest – assuming its transformer and any associated circuitry allows frequencies above ft to pass through to the output.
TRANSFORMERS
All ribbon mics use transformers, and these have an impact on the mic’s tonality – directly by how they load the ribbon element, and indirectly by the impedance they present to the preamplifier. The transformer also places limits on the microphone’s frequency response and transient response, and, if poorly designed, can introduce distortions if driven too hard.
Most ribbon mics use a step-up transformer with a turns ratio of 1:37, which means it amplifies the signal voltage from the ribbon element by 37 times (x 37). This is known as voltage gain; a voltage gain of 37 is like adding 31dB of gain with a preamp. However, the 1:37 turns ratio also increases the ribbon mic’s output impedance by 37 squared (37 x 37), which is 1369 times. Increasing the ribbon mic’s output impedance places greater demands on the preamp, requiring it to have a higher input impedance to avoid affecting the tonality of the microphone.
Any step-up transformer with a turns ratio of 1:37 will provide +31dB of voltage gain and multiply the impedance by 1369 times. That’s the easy part of transformer design. Making a transformer that does not saturate and go into harmonic distortion on big transients or high levels of low frequency energy is not so easy, especially when trying to keep it small enough to fit into a microphone. Neither is making a transformer with good LF response – especially if the manufacturer chooses to use a ribbon with higher impedance. Making the ribbon longer, narrower or thinner all offer performance benefits as described below, but at an increased impedance that might require a more expensive transformer.
The market is flooded with cheap passive ribbon microphones, and the internal transformer is one of the areas where the manufacturer makes significant cost savings. One common mod for cheap passive ribbon mics is to replace the internal transformer with one from an established transformer manufacturer, such as Lundahl’s LL2912, Samar’s RT series or similar from one of the DIY ribbon microphone suppliers found on-line.
ELEMENT DIMENSIONS
Three important factors that affect the ribbon microphone’s tonality are the ribbon element’s length, width and thickness.
Making the ribbon longer results in higher induced current and therefore a higher output signal, which is good. On the downside the extra length results in a narrower polar response in the vertical plane at high frequencies, meaning a duller tonality for sounds arriving in the vertical plane than for those arriving in the horizontal plane. Making the ribbon longer also results in increased impedance and therefore increased potential for the chosen preamp to affect the tonality, and may cause reduced transient response due to the increased weight of the ribbon. Making the ribbon shorter has the opposite effects: lower impedance, potentially faster transient response and better high frequency polar response in the vertical plane, but with a lower output (meaning greater reliance on a quiet preamp with lots of gain).
Increasing the ribbon’s width lowers the high frequency cut-off (ft) and makes the ribbon heavier, potentially reducing the transient response but lowering the impedance. Reducing the ribbon’s width makes it possible to reduce the distance from the front to the back of the ribbon, which raises the microphone’s high frequency cut-off (ft) as explained above and therefore extends the usable bandwidth. It also makes the ribbon lighter, which improves its transient response. On the downside, it makes the ribbon more fragile and increases its impedance.
Using thinner material for the ribbon makes it lighter and therefore potentially improves its transient response, but also makes it more fragile. In addition, as the ribbon material gets thinner its output signal level increases due to its lower mass but its impedance increases due to the smaller cross-sectional conducting area of the ribbon material. Using thicker material for the ribbon makes it heavier and potentially reduces its transient response, but also makes it less fragile and lowers the impedance.
Any of the above-mentioned variations in the ribbon’s length, width or thickness that increase its impedance may also require the use of a different (and potentially more expensive) transformer design, especially if good low frequency response is required.
CORRUGATIONS & RESONANCE
The corrugations in the ribbon element provide elasticity and therefore suspension, allowing it to move freely in accordance with the sound energy. The type and spacing of the corrugations contribute to how much tension can be applied to the ribbon – which is a major contributor to the ribbon mic’s audio performance. The tension determines the ribbon element’s primary resonant frequency, which is typically tuned to somewhere between 15Hz and 45Hz depending on the manufacturer’s design goals. This low resonant frequency is one of the contributors to the ribbon microphone’s characteristic ‘warm and natural’ sound. Compared to the much higher resonant frequencies of condenser microphones (typically between 5kHz and 9kHz), this low resonant frequency is often touted as the reason why the sound from a ribbon microphone can handle a lot of high frequency EQ boosting without sounding harsh – unlike the sound from typical small diaphragm condenser microphones when the same EQ boosts are applied.
LOW FREQUENCY RESPONSE
Resonance and corrugations aside, the ribbon’s low frequency response is ultimately determined by two unavoidable facts. Firstly, it is a pressure gradient microphone; its output level is determined by the atmospheric pressure difference (caused by sound) between the front and back of the ribbon element. As the frequency gets lower, the wavelength gets longer and therefore the pressure difference between the front and back of the ribbon element gets smaller – resulting in less output. [This is explained in detail in a later instalment of this series.] Secondly, the ribbon microphone requires a transformer, and transformers impose their own low frequency limitations on the signal.
NOISE & DISTORTION
Due to the simple passive nature of the ribbon microphone’s transducer, there is no source of noise apart from the thermal noise (aka Johnson noise) that exists in all electrical circuits due to the effect of temperature. This would normally be considered insignificant except that traditional vintage ribbon microphones generate a very small signal that requires considerable gain – enough to bring the thermal noise into significance along with any noise from the preamp – leading to the oft-repeated statement that ribbon mics are noisy and need good preamps. Does this noise affect the tonality of the microphone? If it’s audible and is different between different microphone models, it can be considered part of a microphone’s tonality.
The main forms of distortion in ribbon microphones are due to the ribbon element being pushed to extremes so it is no longer behaving in a linear manner, and low-order harmonic distortion introduced by the transformer – particularly due to saturation from transient peaks and high levels of low frequencies.
PREAMP LOADING
And finally, for those using passive ribbon microphones there is the impact of the preamp on the tonality of the ribbon mic. To prevent the preamp from affecting the tonality of the microphone, the rule-of-thumb is that the preamp’s input impedance should be at least five times greater than the ribbon microphone’s output impedance. The important thing to understand about impedance is that it is frequency dependent; therefore the impedance at one frequency may not be the same at another frequency. With most ribbon microphones having an output impedance of around 300 ohms throughout the midrange frequencies, a preamp with an input impedance of 1500 ohms (5 x 300 ohms) seems reasonable and is easily affordable. However, at the ribbon mic’s resonant frequency its impedance could exceed 1000 ohms, requiring a preamp with at least 5000 ohms input impedance to avoid affecting the ribbon mic’s tonality in the low frequency range (where the resonance occurs). Suddenly the range of suitable and affordable preamps reduces significantly, and investing in an in-line booster (discussed below) makes sense.
ADVANCES
After decades in obscurity, ribbon microphones have been busy catching up to – and perhaps even overtaking – dynamic and condenser microphones. Let’s look at some of the factors behind the revival, along with a couple of evolutionary dead ends…
RARE EARTH MAGNETS
The ribbon microphone is inherently simple and the basic components haven’t changed since the beginning, but there has been considerable improvements with the materials those components are made with. Most significantly, the use of rare earth magnetic materials such as neodymium and samarium-cobalt allow stronger magnetic fields to be created from the same size magnet. For any given ribbon element, a stronger magnetic field means a higher induced current. Designers have used these materials in a number of ways to create new ribbon microphones with higher outputs, better high frequency performance and smaller size.
ACTIVE RIBBONS
Pioneered by Royer Labs with the R122 (introduced in 2002), active ribbon microphones solve many of the limitations of passive ribbon microphones by building a buffering and output circuit into the microphone itself, and provide output levels similar to condenser microphones. They require phantom power to operate and are therefore not damaged by it. The input impedance of the microphone preamp should not affect the tonality of an active ribbon mic any more than it would affect the tonality of a condenser mic.
IN-LINE BOOSTERS
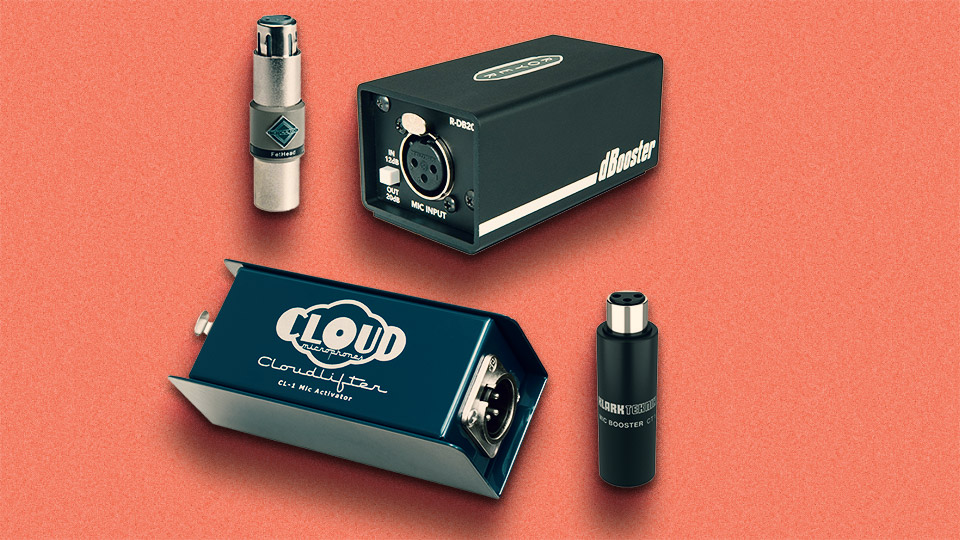
These external devices aim to solve the three problems of passive ribbons (mentioned earlier) by providing a buffer and output circuit that is inserted between the ribbon mic and the preamp – a bit like taking the inside circuitry of an active ribbon mic and putting it in an external box. Apart from preserving the tonality of the ribbon mic by making it independent of the preamp it is connected to, in-line boosters provide output levels similar to condenser mics while also protecting the ribbon element from phantom power – in fact, they need phantom power to operate. Examples include Royer Lab’s dBooster, Triton Audio’s FetHead, Cloud Microphone’s CloudLifter, Radial Engineering’s McBoost and Klark Teknik’s Mic Booster CT1.
ACOUSTIC NANOFILM
In most ribbon microphones the ribbon element is made from ultra-thin aluminium foil, typically between 1.5 and 4 microns thick (0.0015mm to 0.004mm). It can be easily damaged by a small burst of wind or a momentary application of phantom power. In June 2008 ribbon mic manufacturer Crowley & Tripp released a video showing a ribbon element being continually blasted with phantom power, forcing it out of shape in a way that should destroy it. However, when the power was removed the ribbon element returned to its proper corrugated shape, undamaged. Made from an acoustic nanofilm cleverly called ‘Roswellite’, it was not long before Shure – whose reputation is built on making rugged microphones – acquired the company and released two rugged ribbon microphones using Roswellite ribbon elements: the KSM313 and KSM353. The model numbers hark back to Shure’s 300 series of ribbon microphones from the ‘50s and ‘60s.
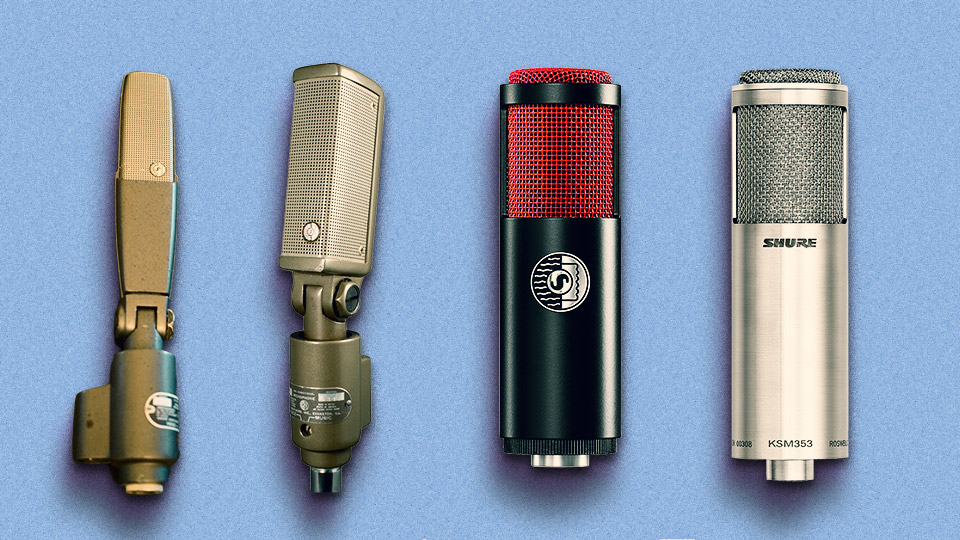
DUAL & PLEATED RIBBONS
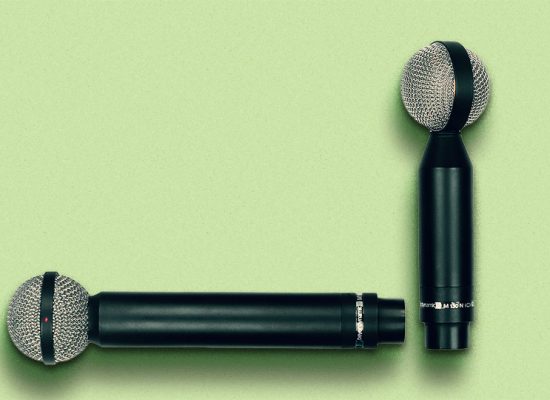
BeyerDynamic’s tiny M130 and M160 microphones are ‘dual ribbon’ designs, using two ribbons in parallel (one behind the other), to increase the sensitivity. The dual ribbon design is not unique to these mics and dates back a long time, but BeyerDynamic’s approach to the corrugations is worth mentioning: each ribbon has a couple of small horizontal corrugations at the top and bottom for suspension and elasticity, but the majority of each ribbon’s length is corrugated vertically, or pleated, for rigidity. This allows greater linear motion of the ribbons through the magnetic field, resulting in a higher output than a traditionally corrugated ribbon of the same dimensions in the same magnetic field. [BeyerDynamic’s vertically pleated ribbon has its detractors, and there are services on-line that will replace the original pleated ribbons with more traditionally corrugated ribbons.]
The dual ribbon design and the vertical corrugations are both aimed at improving the efficiency of converting sound into signal, which is necessary for the small size of these microphones – the M130 and M160 both use 15mm ribbons and correspondingly small magnets, resulting in small ribbon microphones that look like handheld vocal microphones. It’s also worth noting that the M160 is an end-address mic with a hypercardioid polar response, rather than the traditional bidirectional polar response provided by most ribbons, and is commonly used with the M130 (side-address bidirectional) to create an MS pair.
OFFSET RIBBONS & ACOUSTIC FILTERS
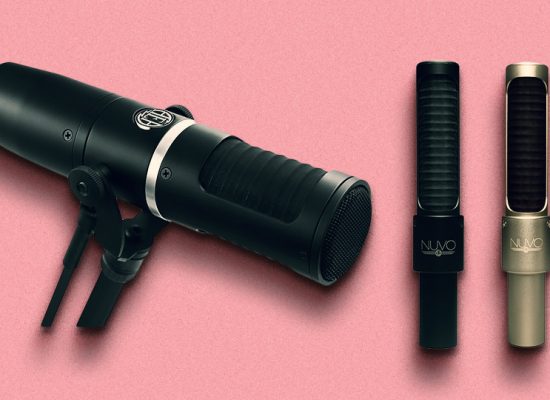
Royer Lab’s patented offset ribbon design, as used in the R121, offsets the placement of the ribbon element relative to the chamber of the microphone. When close-miking at less than a metre or so, the result is a darker tonality for sounds arriving from in front, or, conversely, a brighter tonality for sounds arriving from behind. This two-tone bright/dark option now appears in several contemporary ribbon microphones, although its history can be traced back to Reslo’s tiny RB series of ribbon microphones from the 1960s which used an offset placement of the ribbon element to provide a slightly brighter sound at the rear than the front. Reslo also provided a series of felt and fabric pads that could be installed in different combinations and layers into the mic’s front and rear shells to alter its tonality and polar response to suit specific applications (bass reduction, close talking, intimate singing/crooning, rear rejection, etc.).
ACOUSTIC LABYRINTHS
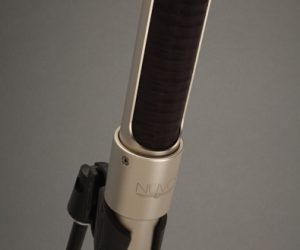
AEA have been pushing the envelope considerably in recent years with active designs that break new ground while offering a degree of specialisation. Their KU5A revisits ideas first seen in RCA’s rare KU3A (released in 1948, also known as the ‘10001’) but updates them considerably. As with the KU3A, it uses an acoustic labyrinth behind the ribbon element to create an end-address ribbon with a supercardioid polar response, suitable for use up close on stage. [The concept of an ‘acoustic labyrinth’ is explored further in the next instalment of this series, which focuses on dynamic microphones.] Meanwhile, AEA’s Nuvo series offers complementary mics with the N8 optimised for distant work and the N22 optimised for close work.
After decades in obscurity, ribbon microphones have been busy catching up to – and perhaps even overtaking – dynamic and condenser microphones...
PHASE PLUGS & LASERS
When designing the NTR, Røde brought a few of their own innovations to the ribbon microphone. Most notable is the addition of a phase plug cleverly built in to the protective mesh that’s placed directly over the ribbon itself. It moderates the airflow over the ribbon element, protecting it from sudden airbursts while smoothing out the frequency response. It also tightens the mic’s polar response by creating different pathways to the ribbon element for off-axis sounds (depending on their angle of arrival), resulting in additional forward gain at higher frequencies and a more pronounced side null across the full frequency range. Røde were also one of the first – if not the first – to use lasers rather than blades to cut their ribbons, resulting in very precise edges with no microscopic frays that can reduce the ribbon’s longevity.
HUMBUCKING COILS
Although humbucking coils are generally associated with electric guitars and dynamic microphones, the first use of the concept for audio applications was in Electro-Voice’s V1 ribbon microphone. (Electro-Voice’s V series of ribbon microphones has an interesting past in which later models and repaired models were quietly fitted with moving coil dynamic capsules, which were considered superior at the time – a warning for collectors of vintage ribbon microphones!) Humbucking coils are rarely mentioned in discussions about ribbon microphones, but have since become common in dynamic microphones and electric guitar pickups. You can read more about the humbucking concept in the next instalment of this series, which focuses on dynamic microphones.
APPLICATIONS & INDICATORS
The ribbon microphone’s low resonant frequency and inherent high frequency roll-off, combined with the sonic characteristics of its internal transformer, give it a tonality that is positively described as warm, mellow, smooth and natural, and negatively described as dull and noisy with low sensitivity. The positive qualities make it a good choice for use on sounds that could be described as cold, thin, harsh or excessively bright, or might become that way if miked with condensers. That includes metallic and wooden percussion, electric guitar amps, and brass instruments – which are also relatively loud sounds that aren’t a problem with the ribbon mic’s low sensitivity. It’s also a good choice for woodwinds, violins and violas, and voices that sing in higher ranges (such as sopranos). Although a ribbon may sound duller than a condenser in the same position, its low resonant frequency means it can handle large amounts of midrange and high frequency EQ boosting without sounding harsh.
The ribbon mic’s inherent high frequency roll-off also makes it a good choice for spotting (i.e. spot-miking or close-miking) an individual instrument within a larger acoustic ensemble such as an orchestra. Its mellow tonality up close tends to match the tonality captured by a main stereo pair of condensers at a distance – a situation where air absorption causes a similar high frequency roll-off to that which occurs naturally in ribbons – making the close-miked instrument a little less hyper-detailed and obvious when blended in with the main pair.
On the negative side, passive ribbon mics are not recommended for use on quiet sounds no matter how appealing their tonal characteristics might be, because their low outputs require considerable gain and therefore risk becoming noisy – a problem that will be exacerbated if the quiet sound source contains little high frequency content to mask the noise. In applications where low noise is important, a large-diaphragm condenser is a smarter match for the sound source.
The ribbon microphone’s fundamental design gives it a bidirectional polar response, although hypercardioid and supercardioid responses are available in contemporary models. Some of the vintage RCA and Western Electric ribbon microphones offer switchable polar responses, including cardioid and omnidirectional. The side rejection of a bidirectional ribbon microphone is as good as microphone rejection ever gets, so if you need powerful rejection, the ribbon is an excellent choice assuming its other characteristics are acceptable for the purpose. In applications where the tonality of a ribbon mic and the rear rejection of a cardioid polar response are both desired, but you do not have a cardioid ribbon microphone, a dynamic cardioid or a large diaphragm condenser cardioid is a smarter choice – tonal issues can be addressed with EQ, but removing spill due to poor rejection is much harder.
Indicators: When condensers are too bright or edgy, and dynamics don’t have sufficient high frequency extension or have an unwanted presence peak, or you’re simply after a natural sound, ribbon microphones are a great choice if the sensitivity and polar responses are appropriate.


